Anyone running Google Ads knows how easy it is to burn through money.
An incorrect setting, a poorly targeted keyword, or even one irrelevant landing page can turn the whole thing into a costly exercise.

It’s easy to do. And Google is more than happy for you to make these costly mistakes – because they’ll win in the end.
That’s exactly why Google has designed the system to be so complex and confusing.
And let’s face it, they’re not likely to go out of their way to help you spend less on Google Ads.
This is why I’m always a big fan of finding ways to reduce advertising costs and maximize ROI.
So I’m going to share with you a technique I sometimes use to save our clients money. It’s often overlooked, and sometimes it’s misconfigured because the system is so confusing.
But if implemented correctly, it can have an incredible impact on reducing your wasted Google Ads spend.
Your data contains some important patterns.
Most accounts that I come across tend to demonstrate a clear seven-day trend.

Maybe weekends are slow, or maybe that’s when you see most of your business. Either way, you’ll most likely see some form of a seven-day trend in your account.
More importantly, your cost per click or your cost per conversion will fluctuate from day to day or even hour to hour.
You might find that weekends produce few clicks or conversions but cost more during the week. You might find out that the most expensive time of the day is when Google seems to be displaying most of your ads. I wonder if there’s a connection?
Whatever the case may be, you have options for working these trends and patterns to your advantage.
Use the reports – but use them wisely.
Before you can start making any changes to your Google Ads account, you’ll need to review a few reports that should help you identify opportunities for saving money. Starting with which days of the week or hours of the day are costing you the most money and producing the least in return.
On your account’s overview page, you may have noticed a small widget report called “Day & hour” which looks something like this:
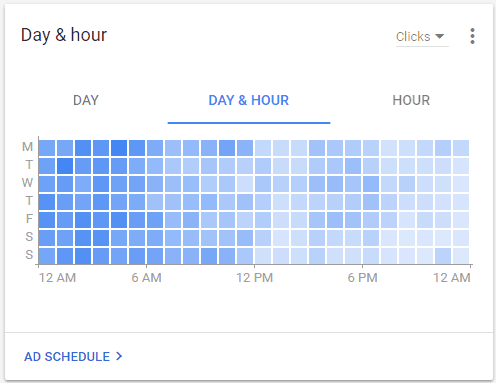
While this report does provide a nice visualization and an interesting overview, it’s difficult to draw any conclusions because it only displays one metric at a time.
It’s important to not only look for days or hours with high costs but also high numbers of clicks or conversions. These are the areas where you’ll make the biggest impact.
For this reason, I would recommend that you head over to the reports section of your account. There you’ll find an entire section dedicated to time:
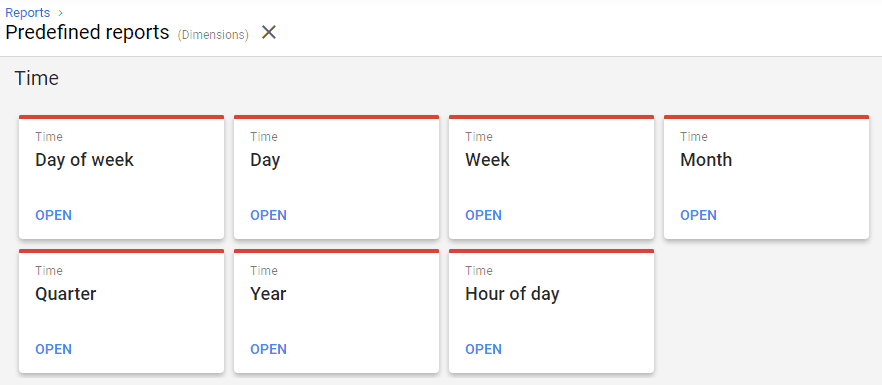
Click on the “Day of week” report to begin your analysis.

Once that report is displayed, you’ll need to make some alterations to the default report layout. Make sure that you have the following metrics visible.
- Clicks
- Impressions
- CTR
- Avg. CPC
- Cost
- Avg. position
- Conv. rate
- Cost / conv.
- Conversions
Next, search for the hour of day column and drag it onto the row header.
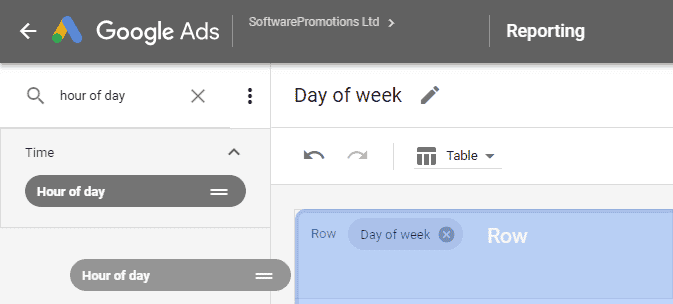
Doing this will combine two reports into one.
Next, make sure that you’re looking at at least seven days worth of data or multiple weeks. Meaning 7, 14, 21, 28 days and so on.
Avoid looking at data containing 30 days, as that would be 4 weeks and two additional days. If those two additional days fell on a weekend, it could skew your analysis.
Keep your data clean.
I would also suggest that you look at a large enough sample size when analyzing this information. It will really depend on your particular situation and the numbers that you’re seeing, but the more data that you’re looking at the more accurate your results will be.
Export that data as a CSV file so that you can manipulate it in Excel. I like to create four pivot tables that look something like the following.
I understand that this is more time consuming to create, but it makes the resulting analysis easier:
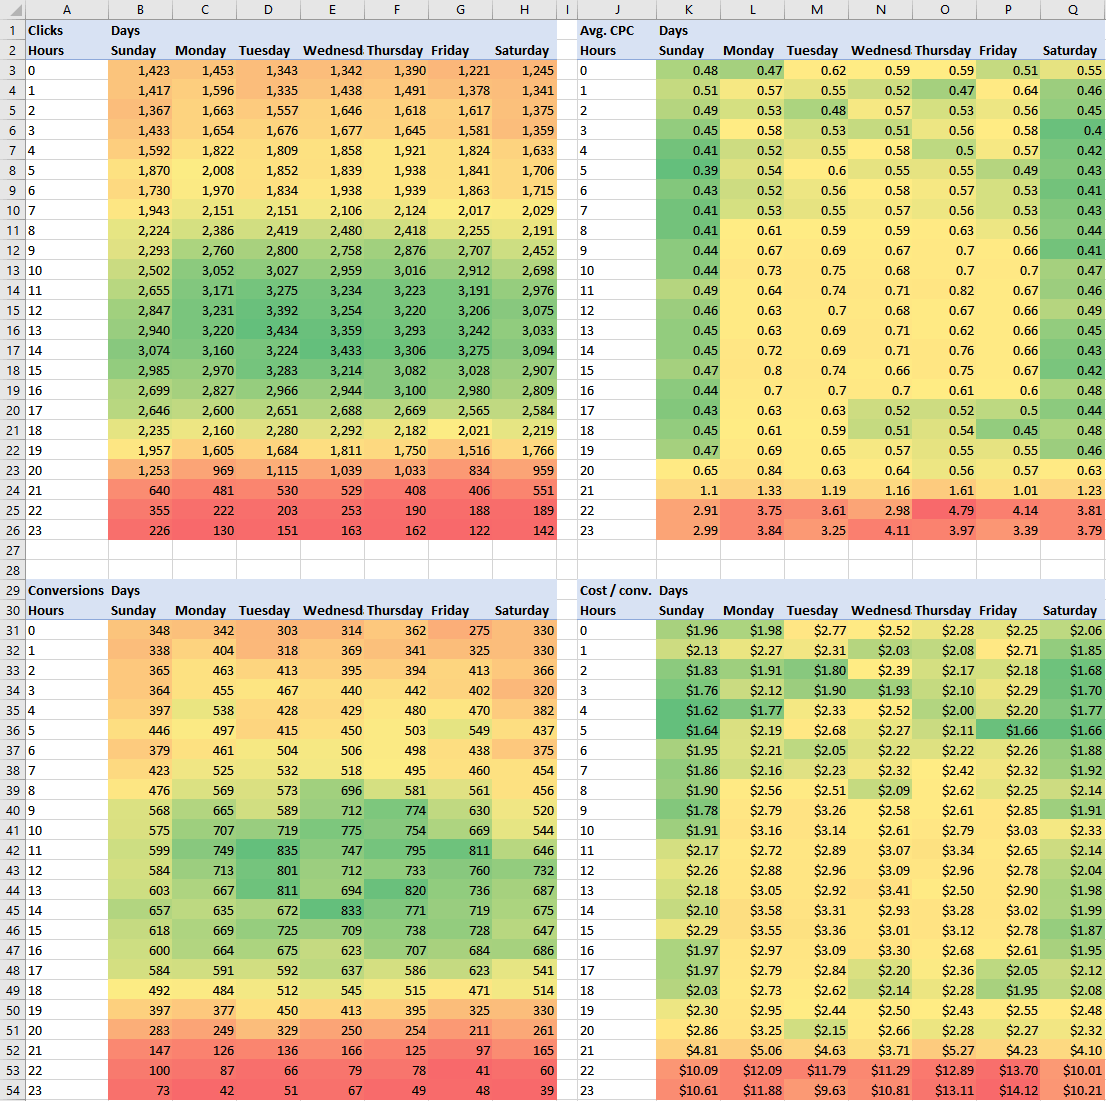
Within this example report, you can clearly see that between 10:00 PM until 12:00 AM costs are quite high, on every day of the week. This would probably be a perfect opportunity to save some money.
What can you actually do in situations like these?
You have a few options to choose from.
Option one: You could adjust your bids at specific times or on specific days of the week.
Sometimes this is the best first course of action because it’s not a drastic measure. You’re simply reducing bids when they tend to be too costly.
Option two: You could turn off your ads at specific times when the cost is high and there is little in return.
If you have a limited budget, this might be the best course of action because you’ll land up spending more of your limited budget during times that produce better results.
My recommendation would be to initially try bid adjustments to see if that can reduce wasted ad spend. If you still see those high costs, then take the more drastic approach of turning off your ads at those specific times, on those specific days or both.
Whichever option you choose, these settings are changed at the campaign-level under the ad schedule section.
By default, your ads will be shown every hour and on every day of the week.
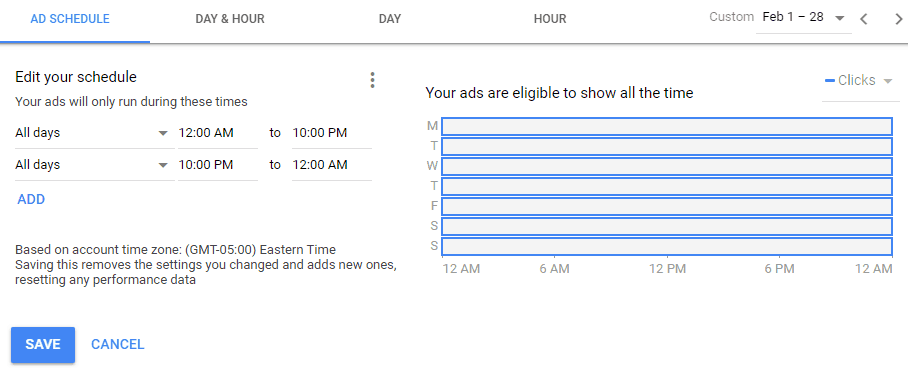
Hypothetically, let’s assume that the data from the pivot tables in the above example was your data. You might want to try and reduce the bids by 50% between 10:00 PM until 12:00 AM, every day of the week.
You’ll need to first edit your schedule to look like this:
Next, once you’ve saved that new schedule, you’ll want to select each day of the week between 10:00 PM until 12:00 AM. Then you’ll need to click on the edit button and select “change bid adjustments”. That will allow you to either increase the bids at specific times or decrease them. In our hypothetical case we’re going to try and reduce them by 50% which would look something like the this:
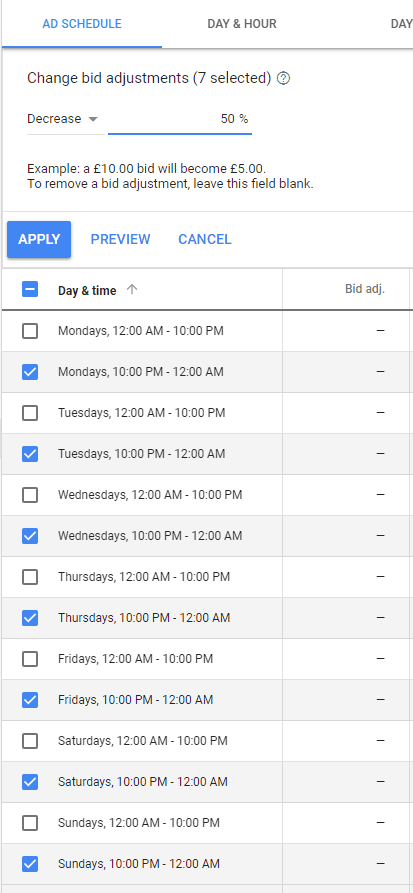
Press apply to save your changes, and then give these new settings some time to work. I would suggest giving a change like this at least a week or more since it will impact every day of the week.
Alternatively, if you chose to turn off your ads at a specific time, you would simply not include that time of day of the week in your ad schedule.
A few final & important points to keep in mind when it comes to ad scheduling.
Complex ad schedulings.
My hypothetical example was easy to deal with, and I suspect you won’t find things so neatly laid out in your own account.
You might see a situation where one random day of the week and one or more hours of the day tend to produce a higher than usual cost per clicks and/or conversions. You can set up schedules to deal with this but it can be difficult to configure when they are sporadic in nature.
Always make sure that you double check your settings because it’s not the easiest interface to work with. Also, review the ad schedule map to make sure you scheduled things correctly.
Time zones.
Ad scheduling is based on the time zone of your Google Ads account. This was one of those settings you made when you set up the account in the first place. If you forgot, you can see your account’s time zone when making these changes or at the bottom of most pages within your Google Ads account.
Location targeting.
Some people might wish to only show their ads between 9:00 AM until 5:00 PM during working hours. If you’re thinking about doing that or something similar, you’ll need to consider your location targeting settings within each of your campaigns.
If you’re targeting more than one location or a location that spans multiple time zones, ad scheduling can be problematic. For example, let’s say you’re targeting the United States and the United Kingdom and you only wish your ads to be shown between 9:00 AM until 5:00 PM. Would that be based on the account’s time zone or the person that would be clicking your ad’s time zone?
You might find yourself needing to split campaigns into time zone specific campaigns depending on your needs.
Bulk editing.
Ad scheduling is a campaign-level setting and at the time of writing this blog post, there is no way to copy those settings from one campaign to another from within the Google Ads interface.
If this is something that you need to do because you have many campaigns, you’ll need to download the Google Ads editor and do the following:
- Create your ad schedule within one of your campaigns.
- Open the Google Ads editor and import those changes.
- Select the campaign-level in the Google Ads editor.
- Select the campaign where you recently added the new ad schedule.
- Right-click and choose copy shell.
- Then, select one or more campaigns where you would like to paste the schedule.
- Then, click on the “PASTE” link right next to the “Ad schedule” text.
Don’t use it if you really don’t have to.
If you review your Google Ads data only to find very slight cost increases, at certain times of the day, I would suggest that you don’t use this feature.
It’s just not worth the trouble, and you could open your self up to problems in the future.
Once you configure ad scheduling, it’s more or less hidden in the background so there’s no clear indication that you have it turned on in a given campaign.
I have seen a few situations where people struggle to understand why performance has plummeted at certain times of the day only to later realize they caused it themselves through ad scheduling.
While ad scheduling is an extremely powerful way to control costs at certain times of the day, it goes without saying, use it with extreme caution.
Unique ideas for your business
The Demystifier puts practical ideas into your hands. You won't find them elsewhere. Original, actionable and insanely effective.

